Last week I posted on my new brown and white toile pillows and promised a DIY. Here are the steps I used. I'm by no means a master seamstress, so please let me know if you have questions! Normally I just do a simple pillow with a knife-edge and hand stitch it closed, but this time I incorporated some ball fringe and an invisible zipper.
Materials: cut your fabric one inch wider than your pillow form to allow for a 1/2-inch seam allowance on all four sides, and plan for a long enough zipper so that you can easily fit your pillow form into the finished pillow. Press your fabric and the zipper so that everything is flat and wrinkle free!
Start by pinning your trim onto the right side of one piece of fabric. Try to make as much of a right angle as possible at the corners. Align your trim so that the two ends meet in an inconspicuous place, probably the bottom of the pillow. Overlap the trim slightly and play around with it until it looks seamless, then pin carefully.
Using a straight stitch, sew the trim onto the fabric. This picture shows the trim once it's been sewn on (see the line of stitching on the wrong side of the fabric?).
Next, place your two fabric pieces right sides together, then open them up and lay them face down, lining up the seam where you plan on installing the zipper. You will be sewing the two fabrics together but leaving a space to install the zipper. This picture just shows how the zipper will be installed in a couple steps; for now you don't need to worry about flipping up the edges of the fabric.
I lay the zipper on top of the fabric, used pins to mark where the zipper would be installed, removed the zipper, then sewed the two pieces of fabric together, sewing from the outside of the fabric in towards the edge of where the zipper will go.
Here you can see that the fabrics have been sewn together on the left side of the picture, but there's a gap for the zipper. Carefully line up where the zipper will go and pin it to one side of the fabric.
Using your zipper foot attachment, sew as close to the zipper coil as possible. (I had somewhat unruly trim, so I ended up pinning them down so I wouldn't accidentally sew over them. This shouldn't be a problem if you're using a standard welt or braided trim.)
I'm halfway finished with the zipper installation in this picture: the zipper has been sewn to the side with the brown trim, so now I'm pinning it to the other piece of fabric and will sew again as close to the zipper coil as possible, but this time on the other side of the zipper.
Yay, a successfully installed zipper! Can you see it? It's hiding right by that one little errant piece of ball fringe.
Now things get easier! Unzip your zipper (or you'll accidentally end up sewing your pillow shut and won't be able to put your pillow form in!), and pin the two pieces of fabric together on the other three sides.
Using a 1/2-inch seam allowance, sew a straight stitch all the way around the three sides. When you're finished, trim the seam allowance back to about 1/4 inch. Cut the extra fabric away from the corners, being careful not to cut any threads.
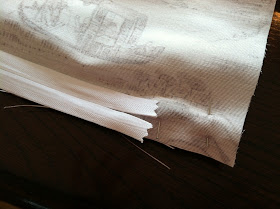
Using your zig-zag stitch (don't forget to change out your zipper foot attachment or you'll break a needle!), go around the edges of the seam and zig-zag stitch to keep them from unravelling.
Here's the final product:

The front and the back of this pillow are identical, but you could also make a patterned front and solid back. And of course you could eliminate the trim, which would make this a faster project. I'm pretty happy with the zipper; I think I might be using this system more often, since I could change out the covers more easily and would just have to store a cover instead of a bunch of bulky pillows!


No comments:
Post a Comment