Showing posts with label ORGANIZATION. Show all posts

March 14, 2012

Organizing your countertops

Lately I've been busy with work and family obligations and getting up at 5:30 every morning to do KOSAMA!  So when I'm not limping around favoring my sore muscles, I'm grading.  Spring break is coming up, though, so hopefully I'll get a chance to tackle some DIY projects then.  In the meantime, here is some tiny bathroom organization I did recently that literally took about one minute.

Our bathroom counter was getting a little too cluttered for me.  I am the kind of person who puts my hair products away EVERY time I use them, and I really dislike having anything but soap and toothbrushes on the counter.  I should probably get medicine cabinets in our next house so I can stow everything in the walls, but in the meantime here's a lesson in the importance of regrouping and repackaging.

Before
Note that Josh's side is WAY worse than mine.  :)


After


I just dumped everything into a basket.  Much better, and also easy to maintain (if organization requires too much effort, your stuff won't stay organized)!  It doesn't have to be a basket.  A tray or a bowl will work well too.


Before
I have been using this Listerine that doesn't have any alcohol since my dental hygienist said that stronger mouthwash can slough off skin on your gums...kind of sounds bad to me.  Plus, it's purple, so that's fun.


After


I decanted the mouthwash into a glass bedside carafe from Crate & Barrel.


What about you?  Are you as picky about your bathroom counter as I am, or am I all alone on this one?

July 13, 2011

Before & After - Filing cabinet

In our slow transformation of one of our bedrooms into a home office, we've added a couch and a new desk.  Next up: a filing cabinet.  I bought a basic black filing cabinet but was looking for a way to make it stand out less, so I decided to paint it the same color as the desk.  This was a pretty fast project; I painted it in an afternoon, let it dry overnight, and had it back in the office the following day.

Here is what I started with: a new filing cabinet (although since you're going to be painting it, an old one would work just fine too).


For this project I used some newspaper and frog tape, a Kilz primer (although I probably would have used Zinsser if the store would have had it in stock), and a couple cans of Rustoleum white gloss enamel spray paint.


First step: tape off all the parts you don't want painted (since this is spray paint, it will go everywhere, so take time to thoroughly cover everything.)  In case you're wondering, I popped out the plastic handles and taped behind the opening, then sprayed the handles separately.


Next, I applied one coat of spray primer.  This actually changed the surface from being smooth and glossy to a little more "grippy" or sandpapery, which I liked.  Read the product description carefully; this type of primer needed to dry for over an hour, so I applied it, moved the cabinet into the shade, and went back inside to let it dry.


After a couple hours of drying time (it was a humid day), I went back outside and applied two light coats of white spray paint.  To get a less blotchy look, start spraying off the surface and then move evenly across the surface, slightly overlapping your last line.  Also, try to maintain the same distance between the spray paint can and the surface so the paint isn't thicker in some places than others.  I was glad I took the time to carefully tape off my cabinet; the lock and the sides of the drawers show that the frog tape works well--there was no leaking of paint underneath the tape.


The white matches the color of the desk very closely; here you can see the two pieces of furniture side by side.

I may still go back and add a couple coats of clear poly just to even out the finish and make it a bit more durable, but I'm pretty happy with the final product.  Here are a couple before and afters of the filing cabinet in its new place in our office:


Before

 After

Doesn't that look better?  I feel like having the desk and filing cabinet the same color makes them look more like a set, and the white makes them look less obtrusive in the room.  In fact, I am feeling more organized just looking at all that white!


April 5, 2011

In stores now


I was in Walmart last week and ran across these large plastic bins with rope handles.  Our local stores had several colors: a dusty green, turqoise, blue, red, coral, and teal (much better than the gray or black I usually see these in!).  I also thought the price of $4.50 was great!


I would use these to hold sports equipment or gardening supplies in the garage; winter boots or scarves, hats, etc. in a mud room; or stuffed animals or other toys in a playroom or kid's room.  I also think they would make for a fun laundry basket in a child's bathroom.

March 28, 2011

Necklace board

For a while now I have been needing a better way to store my necklaces.  They always get tangled up in the bottom of my jewelry box or in my extra jewelry "storage" (a gallon ziploc bag).  So as I was rummaging around looking for a "free" project (one for which I already had most of the materials), I came up with the idea of turning a leftover canvas art board and a remnant of fabric into a vertical necklace board.


Materials you will need: a stretched canvas, some fabric to cover your board, hooks, a drill, and a staple gun


After ironing your fabric well, position it over the board and staple on the back of the board.  If you have a design on the fabric, be sure that it is centered and straight.


As you are stapling, start at the center of each side, then gradually work towards the corners.  Be sure not to overstretch the fabric (especially if you have a pattern on the fabric).


 I used these 7/8" cup hooks.  They are fine as-is, but I decided to modify the color slightly to match other hardware in the closet.


Using a Rub 'n Buff product in antique gold, I coated the hooks with a thin layer, then buffed it off to make the hooks look like they had more of a brass finish.


Play around with the necklaces you want to hang to determine how long they are and how you will need to space the hooks.


I decided to hang long necklaces at the top of the board, then shorter ones along the sides and the bottom edge.


Using a measuring tape or yardstick, space your hooks and mark their placement on the fabric.


Drill pilot holes for the hooks (check the box of hooks for the manufacturer's suggestion on what size drill bit to use).  Then just screw in the hooks, hang the board on the wall, and load up with your necklaces.


January 11, 2011

Hidden vs. open storage

Yesterday I shared how we organize our master bedroom closet, but we actually don't have space to store all of our clothes and shoes in that one closet.  The truth is that I have things stashed elsewhere in the house too: a plastic Rubbermaid bin of purses in the basement, a closet full of winter coats in the guest room, and baskets of t-shirts and workout clothes in our room.  Some of these are hidden storage, while others are very much open to view.  Ideally, your home should have a mix of both types of storage, depending on factors such as the product stored, the frequency of use, and your own personal aesthetic preferences.  Here are a few examples of each organizational strategy:

Hidden Storage
Some people prefer hidden storage for pretty much everything they own.  This is ideal if you don't want to keep everything super neat all the time (which applies to almost everyone...can you think of many people who would want a glass-door refrigerator and all glass-front cabinets in the kitchen?  Last night's leftovers look much better behind a stainless steel door, I think!).

{Not reality for most people!}

Hidden storage is also great for seasonal items or products you don't use often.  It's fine to keep the extra guest bedroom blankets in a storage bag under the bed, or to move your winter coats down to the basement at the end of the season.

And hidden storage is a necessity for certain items.  Spices, for example, begin to lose their potency when stored in sunlight or near a heat source.  So as pretty as that countertop spice holder looks sitting beside your stove, it's actually best if you store spices in a cool, dark place.

{The little spice closet inset into the wall of our old kitchen looked cute, but it was not ideal for storing spices}


{Our current pantry has plenty of room for lining up spice bottles behind closed doors -- much better!}


Of course, the great thing about hidden storage is that all you have to do is close a door and the room looks clean again!

{This mudroom uses hidden storage so it always looks neat}


Open Storage
When I say "open storage," what I mean is storage that is not hidden in a closet or behind cabinet doors.  You can still hide some clutter in totes and baskets, but open storage is much more accessible and visible than hidden storage.

The great thing--and the worst thing--about open storage is that it has to look good at all times.  If your dreams involve a shopping spree at the Container Store, this may be for you.  Keep in mind that, from a budget standpoint, open storage is usually going to be more expensive than hidden storage.  It's much cheaper to buy a bunch of large plastic bins for the garage or basement than it is to buy a set of small baskets.  Nonetheless, open storage is great for things you use often (towels and toiletries in the bathroom, toys for the kids, or books and magazines you are reading now).

Here are a few places where we use open storage in our home:

{Seagrass media bins hold DVDs on open shelves}


{A floating shelf in the bathroom is a handy ledge for towels and lotion}


{Shelves under the kitchen island hold baskets of dishtowels, mixing bowls, and metal and glass canisters filled with baking ingredients}


{More open shelves hold cookbooks and serving pieces}


A couple more examples of how open storage can be both functional and good looking:

{A clever idea: use magazine holders to store clutches and as bookends to support your larger handbags}


{Lots of matching storage canisters help this bathroom look uncluttered}


So, are you more of a hidden or open storage type of person?


Photo credits: mudroom (Jennifer Worts design), white bathroom (Livingetc)

January 10, 2011

Closet organization


 Now that the new year has started, I am sure some of us have goals of getting our lives more organized, whether that means using our daily planners more (see the 2011 calendar roundup here), getting rid of things we don't use (one of my New Year's resolutions -- see here), or just decluttering our houses.

Therefore, I thought I would dedicate a couple posts this week to organization.  Today I am sharing the storage system I use in our current master bedroom closet, and tomorrow I'll go over the merits of hidden vs. open storage.  (And to see one method for organizing your kids' toys, see this post.)

One of the best things about being in a newer house is that there is typically more closet space.  Our master bedroom closet is not huge by any means, but I tried to maximize the available wall and floor space.  Here's how we use the space (see the end of the post for sources).


One side of our closet is primarily clothes (a combination of hanging and folded).  I invested in matching wood hangers and canvas storage bins so that everything looks more uniform.


Pants hangers hold all my skirts.  I sort them roughly by color and try to swap them out each season (since it's winter now, I have a lot of black and grey here!).


My shirts are also organized by color.  I find it makes it so much easier to get dressed every day.


My husband's shirts are--you guessed it!--organized by color too.  I also put all the button-downs together, polos together, blazers, etc.


Here you can see the canvas bins we use to store out-of-season clothes.  A couple small shelves hold my husband's baseball caps and shorts.


We each have a hanging storage system for our sweaters.  These are -- surprise, surprise -- grouped by color too.  In the summer we don't have as many sweaters, so I store some folded shorts or skirts here.


The other side of the closet is my favorite side: my shoes!  I have four shelves (the top one isn't visible in the picture above), with boots lined up on the floor below.  I hope to eventually add a fifth shelf at the very top of the closet to store handbags.

I also bought a floating shelf, cut it to size, and painted it the same color as the walls.  Installed on the far closet wall, it holds jewelry, a valet tray, folded up scarves, etc.  The corner of the shelf is barely visible in the picture above.

Here are a few recommendations I have for your closet, regardless of how small or big it is:

Be organized.  I like to categorize everything as much as possible (short-sleeve, long-sleeve, color, etc.).  At the very least, separate your pants from your skirts, shirts, jackets, etc.

Paint your walls.  I don't think closets need to have white walls.  They just show scuffs more quickly, and they are not inspirational when you are standing at the door trying to come up with an outfit.  I continued the taupe wall color from our master bedroom into the closet, which makes it feel more like part of the room.  However, if I weren't sharing my closet with my husband I probably would have painted it a brighter color or used a fun patterned wallpaper.

Have good lighting.  If you can't see your clothes, it's hard to find anything.  Install a lighting fixture with more than one light bulb, or stick little battery powered lights in the dark corners of the closet.  If you can manage it, having a window in the closet is great!

Use matching hangers.  They can be thin space-saving ones, white plastic, or wood.  It really doesn't matter as long as your clothes aren't getting stretched out of shape.  Having a consistent style makes a really big difference in making your closet look organized.


Sources:
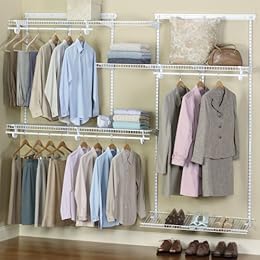
We didn't use a really expensive closet system.  If you can afford one, great, but if not, you can still make your closet look organized by using a consistent system to store your clothes.  Here are some items similar to what we used (click on the product names for links).


Related Posts Plugin for WordPress, Blogger...